Temporal.io 워크플로우 튜토리얼 — TypeScript로 분산 작업 큐와 장기 실행 프로세스 구현
Temporal.io는 분산 워크플로우를 코드로 표현하고, 실패·재시도·장기 실행을 프레임워크가 자동으로 처리하는 오픈소스 워크플로우 엔진이다. BullMQ나 Celery처럼 큐에 작업을 넣는 방식이 아니라, 워크플로우 실행 상태를 이벤트 소싱으로 영구 저장해 서버가 재시작돼도 정확히 중단된 지점부터 재개한다. Temporal은 Uber의 Cadence에서 포크된 프로젝트로, 현재 Temporal Technologies가 관리한다.
by Lee
Temporal.io는 분산 워크플로우를 코드로 표현하고, 실패·재시도·장기 실행을 프레임워크가 자동으로 처리하는 오픈소스 워크플로우 엔진이다. BullMQ나 Celery처럼 큐에 작업을 넣는 방식이 아니라, 워크플로우 실행 상태를 이벤트 소싱으로 영구 저장해 서버가 재시작돼도 정확히 중단된 지점부터 재개한다. TypeScript SDK로 결제 처리, 이메일 발송, 외부 API 호출 같은 신뢰성이 필요한 백엔드 작업을 어떻게 구현하는지 단계별로 살펴본다.
Temporal.io란 무엇인가
Temporal은 Uber의 Cadence에서 포크된 프로젝트로, 현재 Temporal Technologies가 관리한다. 핵심 개념은 Durable Execution이다. 일반적인 비동기 작업 큐는 워커가 죽으면 실행 중이던 작업의 상태를 잃는다. Temporal은 워크플로우의 모든 실행 이력을 이벤트 히스토리로 기록해, 워커 재시작 시 리플레이를 통해 동일한 상태를 복원한다.
핵심 구성요소
•
•
•
•
•
•
Workflow: 비즈니스 로직의 흐름을 정의하는 결정론적 함수•
Activity: 외부 API 호출, DB 쿼리 등 부수 효과가 있는 실제 작업 단위•
Worker: Workflow와 Activity를 실행하는 프로세스•
Temporal Server: 상태 관리 및 스케줄링을 담당하는 서버•
Client: 워크플로우를 시작하거나 쿼리하는 SDK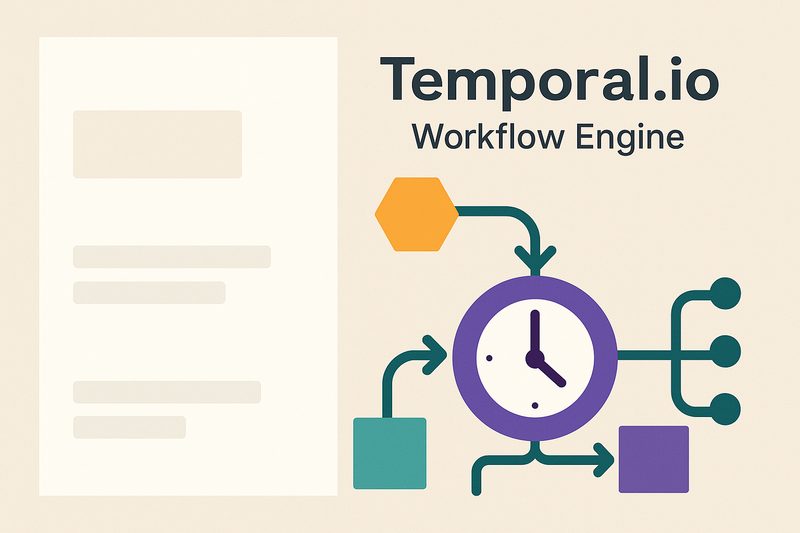
개발 환경 설치 및 프로젝트 구성
Temporal 로컬 개발은
temporal CLI가 제공하는 dev server로 시작한다. 별도 Docker 설정 없이 단일 바이너리로 Temporal Server + UI를 모두 실행할 수 있다. Node.js 18 이상과 npm이 필요하다.Temporal CLI 설치 및 개발 서버 실행# macOS (Homebrew) brew install temporal # 개발 서버 시작 (localhost:7233, UI: localhost:8233) temporal server start-dev # 프로젝트 초기화 mkdir temporal-demo && cd temporal-demo npm init -y npm install @temporalio/workflow @temporalio/activity @temporalio/worker @temporalio/client npm install -D typescript ts-node @types/node # tsconfig.json npx tsc --init --target es2020 --module commonjs
첫 번째 워크플로우 작성
워크플로우는 결정론적으로 작성해야 한다. 같은 이벤트 히스토리를 리플레이하면 반드시 같은 결과가 나와야 하기 때문이다.
Date.now(), Math.random(), 직접적인 I/O 호출은 워크플로우 코드에서 금지다. 외부 작업은 반드시 Activity로 분리해야 한다.src/workflows.ts — 주문 처리 워크플로우import { proxyActivities, sleep } from '@temporalio/workflow'; import type * as activities from './activities'; const { chargePayment, sendConfirmationEmail, updateOrderStatus } = proxyActivities<typeof activities>({ startToCloseTimeout: '30 seconds', retry: { maximumAttempts: 3, }, }); export interface OrderInput { orderId: string; userId: string; amount: number; email: string; } export async function orderWorkflow(input: OrderInput): Promise<string> { await updateOrderStatus(input.orderId, 'processing'); // 결제 처리 const paymentId = await chargePayment(input.userId, input.amount); await updateOrderStatus(input.orderId, 'paid'); // 확인 이메일 발송 await sendConfirmationEmail(input.email, input.orderId, paymentId); await updateOrderStatus(input.orderId, 'completed'); return paymentId; }
src/activities.ts — Activity 구현import { Context } from '@temporalio/activity';

export async function chargePayment(
  userId: string,
  amount: number
): Promise<string> {
  // Activity는 I/O가 가능하다
  Context.current().heartbeat('charging...');

  // 실제 결제 API 호출 예시
  const response = await fetch('https://api.payment.example/charge', {
    method: 'POST',
    headers: { 'Content-Type': 'application/json' },
    body: JSON.stringify({ userId, amount }),
  });

  if (!response.ok) {
    throw new Error(`Payment failed: ${response.status}`);
  }

  const { paymentId } = await response.json();
  return paymentId;
}

export async function sendConfirmationEmail(
  email: string,
  orderId: string,
  paymentId: string
): Promise<void> {
  console.log(`Sending confirmation to ${email} for order ${orderId}`);
  // 이메일 전송 로직
}

export async function updateOrderStatus(
  orderId: string,
  status: string
): Promise<void> {
  console.log(`Order ${orderId} status → ${status}`);
  // DB 업데이트 로직
}
워커 실행과 클라이언트로 워크플로우 시작
워커는 Temporal Server에 연결해 특정 Task Queue를 폴링하고 워크플로우·액티비티를 실행한다. 클라이언트는 워크플로우를 시작(start)하거나, 완료를 대기(execute)하거나, 상태를 조회(query)하는 역할을 한다. 워커와 클라이언트는 별도 프로세스로 실행된다.
src/worker.ts — 워커 등록 및 실행import { Worker } from '@temporalio/worker';
import * as activities from './activities';

async function main() {
  const worker = await Worker.create({
    workflowsPath: require.resolve('./workflows'),
    activities,
    taskQueue: 'order-processing',
    // 동시 실행 제한
    maxConcurrentActivityTaskExecutions: 10,
    maxConcurrentWorkflowTaskExecutions: 20,
  });

  console.log('Worker started, polling order-processing queue...');
  await worker.run();
}

main().catch((err) => {
  console.error(err);
  process.exit(1);
});
src/client.ts — 워크플로우 시작 및 결과 대기import { Client, Connection } from '@temporalio/client';
import { orderWorkflow } from './workflows';

async function main() {
  const connection = await Connection.connect({
    address: 'localhost:7233',
  });

  const client = new Client({ connection });

  // 워크플로우 시작
  const handle = await client.workflow.start(orderWorkflow, {
    taskQueue: 'order-processing',
    workflowId: `order-${Date.now()}`,
    args: [{
      orderId: 'order-001',
      userId: 'user-123',
      amount: 99000,
      email: 'user@example.com',
    }],
  });

  console.log(`Workflow started: ${handle.workflowId}`);

  // 완료될 때까지 대기
  const paymentId = await handle.result();
  console.log(`Completed, paymentId: ${paymentId}`);

  await connection.close();
}

main().catch(console.error);
재시도 전략과 타임아웃 설정
Temporal의 핵심 강점 중 하나는 세밀한 재시도·타임아웃 설정이다. 각 Activity마다 서로 다른 정책을 적용할 수 있다. 결제 API는 재시도 횟수를 줄이고, 이메일 발송은 더 관대하게 설정하는 식으로 비즈니스 로직에 맞게 구성한다.
Activity별 세밀한 재시도·타임아웃 설정import { proxyActivities, ApplicationFailure } from '@temporalio/workflow';
import type * as activities from './activities';

// 결제: 재시도 3회, 타임아웃 30초
const { chargePayment } = proxyActivities<typeof activities>({
  startToCloseTimeout: '30 seconds',
  retry: {
    maximumAttempts: 3,
    initialInterval: '2 seconds',
    backoffCoefficient: 2.0,
    maximumInterval: '30 seconds',
    // 이 에러는 재시도하지 않음
    nonRetryableErrorTypes: ['PaymentDeclinedError'],
  },
});

// 이메일: 재시도 최대 10회, 최대 5분 간격
const { sendConfirmationEmail } = proxyActivities<typeof activities>({
  startToCloseTimeout: '60 seconds',
  scheduleToCloseTimeout: '10 minutes',
  retry: {
    maximumAttempts: 10,
    initialInterval: '5 seconds',
    backoffCoefficient: 1.5,
    maximumInterval: '5 minutes',
  },
});

// Activity 내에서 재시도 불가 에러 던지기
export async function chargePaymentImpl(userId: string, amount: number) {
  const result = await paymentGateway.charge(userId, amount);
  if (result.errorCode === 'CARD_DECLINED') {
    // nonRetryable = true → 재시도 안 함
    throw ApplicationFailure.create({
      type: 'PaymentDeclinedError',
      nonRetryable: true,
      message: '카드가 거절되었습니다',
    });
  }
}
타임아웃 종류 정리
•
•
•
•
•
startToCloseTimeout: Activity 시작~완료까지 허용 시간 (권장 설정)•
scheduleToCloseTimeout: 큐에 들어간 시점부터 완료까지 전체 시간•
scheduleToStartTimeout: 큐에서 워커가 픽업하기까지 허용 시간•
heartbeatTimeout: Heartbeat 없이 허용되는 최대 유휴 시간 (장기 Activity 필수)Signal과 Query — 실행 중 워크플로우 제어
Signal은 실행 중인 워크플로우에 이벤트를 보내는 메커니즘이다. 예를 들어 주문 취소 요청이 들어오면 진행 중인 orderWorkflow에
cancel 시그널을 보내 안전하게 중단할 수 있다. Query는 워크플로우의 현재 상태를 외부에서 조회할 때 사용한다.Signal과 Query를 활용한 취소 가능한 워크플로우import { proxyActivities, defineSignal, defineQuery, setHandler, condition, } from '@temporalio/workflow'; import type * as activities from './activities'; const { chargePayment, refundPayment, updateOrderStatus } = proxyActivities<typeof activities>({ startToCloseTimeout: '30 seconds' }); // Signal/Query 타입 정의 export const cancelSignal = defineSignal<[{ reason: string }]>('cancel'); export const statusQuery = defineQuery<string>('getStatus'); export async function orderWorkflow(input: OrderInput): Promise<string> { let cancelled = false; let cancelReason = ''; let currentStatus = 'started'; // Signal 핸들러 등록 setHandler(cancelSignal, ({ reason }) => { cancelled = true; cancelReason = reason; }); // Query 핸들러 등록 setHandler(statusQuery, () => currentStatus); currentStatus = 'charging'; const paymentId = await chargePayment(input.userId, input.amount); // 취소 시그널이 왔으면 환불 후 종료 if (cancelled) { currentStatus = 'refunding'; await refundPayment(paymentId); await updateOrderStatus(input.orderId, 'cancelled'); return `cancelled: ${cancelReason}`; } currentStatus = 'completed'; return paymentId; }
클라이언트에서 Signal 전송 및 Query 조회import { Client, Connection } from '@temporalio/client';
import { orderWorkflow, cancelSignal, statusQuery } from './workflows';

const client = new Client({ connection: await Connection.connect() });

const handle = client.workflow.getHandle('order-001');

// 현재 상태 조회 (Query)
const status = await handle.query(statusQuery);
console.log(`Current status: ${status}`);

// 취소 시그널 전송
await handle.signal(cancelSignal, { reason: 'User requested cancellation' });

// 완료 대기
const result = await handle.result();
console.log(`Final result: ${result}`);
Cron 스케줄과 장기 실행 워크플로우
Temporal은 Cron 스케줄 기반의 반복 워크플로우를 기본 지원한다. 별도 크론 서버 없이 클라이언트에서
cronSchedule 옵션만 설정하면 된다. 또한 수십 분~수 시간짜리 장기 실행 Activity는 heartbeat를 주기적으로 보내 Temporal이 Activity가 살아있음을 알게 해야 한다.Cron 워크플로우와 Heartbeat 패턴// Cron 워크플로우 시작 (매일 오전 9시) await client.workflow.start(dailyReportWorkflow, { taskQueue: 'reports', workflowId: 'daily-report', cronSchedule: '0 9 * * *', // Cron 표현식 }); // 장기 실행 Activity에서 Heartbeat 전송 import { Context } from '@temporalio/activity'; export async function processLargeDataset(datasetId: string): Promise<void> { const items = await fetchDataset(datasetId); for (let i = 0; i < items.length; i++) { // 취소 시그널 체크 (Heartbeat 내부에서 CancelledFailure 발생) Context.current().heartbeat(`Processing ${i}/${items.length}`); await processItem(items[i]); // 워커 재시작 시 마지막 Heartbeat details로 이어서 처리 가능 const lastHeartbeat = Context.current().info.heartbeatDetails; if (lastHeartbeat && i < lastHeartbeat.index) continue; } }
Temporal vs BullMQ vs Celery — 어떤 상황에 맞나
세 도구는 서로 다른 트레이드오프를 가진다. Temporal은 복잡한 비즈니스 로직과 강한 신뢰성이 필요할 때, BullMQ는 Node.js 생태계에서 빠르게 Redis 기반 큐가 필요할 때, Celery는 Python 환경에서 성숙한 분산 작업 큐가 필요할 때 적합하다.
Temporal을 선택해야 하는 케이스
• 결제, 계약, 승인 플로우처럼 중간에 실패하면 데이터 정합성이 깨지는 작업
• 외부 이벤트(Signal)를 기다리며 수일간 대기하는 워크플로우
• 장애 후 재시작 시 정확히 이전 상태에서 재개가 필요한 배치 처리
• 여러 Microservice에 걸친 Saga 패턴 구현
• 결제, 계약, 승인 플로우처럼 중간에 실패하면 데이터 정합성이 깨지는 작업
• 외부 이벤트(Signal)를 기다리며 수일간 대기하는 워크플로우
• 장애 후 재시작 시 정확히 이전 상태에서 재개가 필요한 배치 처리
• 여러 Microservice에 걸친 Saga 패턴 구현
프로덕션 배포 체크리스트
Temporal Cloud 또는 셀프호스팅 모두 프로덕션 배포 전에 확인해야 할 사항이 있다. Temporal Cloud는 managed 서비스로 운영 부담이 낮고, 셀프호스팅은 PostgreSQL/Cassandra 기반 클러스터를 직접 관리해야 한다.
프로덕션 배포 시 확인 항목
• Namespace 분리: 환경별(dev/staging/prod) Namespace 별도 운영
• 워크플로우 버저닝:
• 메트릭 연동: Prometheus + Grafana로 워크플로우 레이턴시, 실패율 모니터링
• Archive 설정: 완료된 워크플로우 히스토리 S3/GCS 보관
• 워커 스케일링: 큐 깊이(queue depth)에 따른 HPA 설정
• SDK 버전 고정: 워크플로우 리플레이 동작이 SDK 버전에 의존
Temporal TypeScript SDK 공식 문서 보기• Namespace 분리: 환경별(dev/staging/prod) Namespace 별도 운영
• 워크플로우 버저닝:
patched() API로 하위 호환 변경 처리• 메트릭 연동: Prometheus + Grafana로 워크플로우 레이턴시, 실패율 모니터링
• Archive 설정: 완료된 워크플로우 히스토리 S3/GCS 보관
• 워커 스케일링: 큐 깊이(queue depth)에 따른 HPA 설정
• SDK 버전 고정: 워크플로우 리플레이 동작이 SDK 버전에 의존
Temporal.io워크플로우 엔진TypeScript분산 시스템Durable Execution작업 큐BullMQ백엔드오픈소스마이크로서비스
관련 도구
함께 보면 좋은 문제 해결
EXPLORE / Open Source
이어서 읽어보기
Open SourceElysiaJS 실전 튜토리얼 — Bun 기반 TypeScript API 서버, JWT 인증, Swagger 문서화, Docker 배포2026-04-25
Open SourceSupabase vs Firebase 2026 비교 — 실무 선택 가이드2026-03-20

Open SourcePocketbase 실전 튜토리얼 — Docker 설치부터 실시간 구독·JavaScript SDK 완전 구현까지2026-07-11

Open Source오픈소스 기여 시작 가이드 — 첫 PR까지2026-04-13